Wednesday, April 17, 2013

Pineapple Carrot Cake with Pineapple Icing


Do you feel sometimes that you express better in writing than in person? I never realized up until recently that I have a hard time expressing how I feel. I prefer letting my fingers do all the talking. We all encountered misunderstandings or communication problems throughout our life, many times dispute can be pointless if both sides don't understand each other situation. The best way to mediate this situation is through writing. Writing never gets old to get the message through. I got this idea when I watched this TedTalk, it works quite effectively.

You must be tired of having three chocolate recipes in a row, it might be too indulgent for some of you viewers. Let's put the chocolate aside for a while and focus on the moist fruity cake. I wanted to make the healthiest, fruitiest and moistest cake possible through what I know up until now about baking. A while back, I published about the science of making a moist cake in my chocolate cake post. I applied some of the science in this recipe. Many recipes require some kind of fat to make the cake moist such a heavy cream and yoghurt. You can substitute these ingredients for apple sauce. 

This recipe is easy to whip up. It has been an absolute favourite in bake sales. Just the name Pineapple Carrot Cake without the Pineapple Icing sounds already healthy. Maybe people are now more and more health-conscious? The cake is moist and fruity, the perfect snack when your hunger strikes you down.

Makes one 13''x9'' cake
Preparation Time: 20 mins
Baking Time: 45 mins
Cooling Time: 15 mins
Printable Recipe

Ingredients

Cake
1 can crushed pineapple, liquid reserved
3 eggs
¾ cup white sugar
½ cup vegetable oil
⅓ cup apple sauce
1 ½ tsp vanilla
1 ¾ cup all-purpose flour
1 ½ tsp ground cinnamon (and/or ground cloves)
1 tsp cream of tartar
1 ½ tsp baking soda
1 pinch salt
2 ¼ cup grated carrots
Handful of raisins, soaked in the reserved pineapple juice

Pineapple Icing
1 ½ cups icing sugar
3 tbsps reserved pineapple juice

Procedure

1. Preheat oven to 350F. Lightly oil a 13’’x9’’ baking pan, lay a parchment paper.

2. In a medium bowl, beat eggs and sugar until pale.

3. Stir in vegetable oil, applesauce, and vanilla.


4. In a separate bowl, whisk flour, cinnamon, baking soda, cream of tartar, and salt.

5. Stir in egg mixture until just moist (don’t mix too much to avoid developping the gluten)


6. Stir in pineapple, carrots and raisins.


7. Transfer batter to the prepared baking pan. Bake for 45 mins.


8. Afterwards, cool for 15 mins.


9. For the icing, mix icing sugar with pineapple juice.


10. Spread it on the cake. (Don’t spread the icing while the cake is hot)


11. Serve.

Saturday, March 16, 2013

Chocolate Sushi with Coconut Rice


I considered myself as an autodidact. I learn things through peers, reading articles and numerous trials and errors. School has the tendency to prevent self-development, prevent us to evolve as a person. It seems our success depends strongly on how well we perform in school. Ever since I started graduate school, I have the freedom to explore new horizons - areas that are unknown to me, things that I always wanted to learn that are outside of my field of expertise (nanotechnology).

Being creative in cooking is all about applying your past experiences to create something original. Inspirations come from my travels to the UK, Singapore, South Korea, Hong Kong and within Canada. Inspirations also come from learning through friends where we gather together for cooking. Finally, inspirations come from numerous successes and failures in the kitchen. These experiences are both instructive and a source of inspiration for others.

Mango and Coconut Rice Sushi. Photo Credit: Hossein Ghayoor
A while back, sushi was the cooking theme. More than 20 people participated in this event. This cooking party was different from our usual events. Instead of paying big bucks for a how-to-make-sushi course, people had to bring their own fillings and make their own sushi through the guidance of other more-or-less experienced sushi makers. The hosts made over 12 cups of sushi rice. You can't imagine how many sushi was made throughout the evening.

Photo Credit: Hossein Ghayoor
Here is my take on sushi: I see a piece of sushi which can be broken down into three fundamental parts - a dark pliable outer layer, white rice and some colourful fillings. As long I have all these three components, it can be considered as a sushi. My wildest attempt is to make a dessert sushi. I came up with a chocolate sushi filled with sweet coconut rice, figs, and strawberries. The chocolate 'seaweed' is the modelling chocolate, often used in wedding cakes for making designs. It's pliable and simple to make, requires only 2 ingredients. Modelling chocolate has a similar texture to play-d'oh. The coconut rice is an inspiration from my trip to Singapore where coconut milk and rice seems to be an inseparable duo. Finally, strawberries and figs marry well with the chocolate. Grab a bite of this chocolate sushi, it's simply irresistible, every flavour from each individual ingredient is distinguishable in this one bite - a one-bite wonder.

Photo Credit: Hossein Ghayoor
Chocolate Sushi with Coconut Rice
Makes about 30 chocolate sushi
Preparation Time: 30 mins
Cooking Time: 30 mins
Cooling Time: 2 hours + overnight
Printable Recipe

Ingredients

Modelling Chocolate
14 oz. chocolate pellets
5 oz. light or dark corn syrup

Coconut Rice
3/4 cup jasmine rice
1 can  (400mL) coconut milk
1/3 cup white sugar
1/2 tsp salt

Fillings
2 figs, thinly sliced
2 strawberries, thinly sliced

Procedure

1. In a double boiler, melt chocolate pellets over medium heat.


2. Add in corn syrup and stir until thick. The mixture should not coat your finger. 


3. Divide mixture into two, wrap it in a plastic bag. Cool at room temperature for 2 hours.


4. Meanwhile, prepare the coconut rice. Triple wash rice with cold water until the water becomes clear.

5. In a medium pot, combine rice, coconut milk, sugar and salt. Bring to a boil. Cover and simmer over medium heat for 30 mins until rice becomes tender and sticky. Remove from heat, cool to room temperature.

6. For the modelling chocolate, transfer onto wax paper. Roll it into a rectangle (about 13'' x 6'') - it should be at least 2mm thick to avoid breaking the dough.


7. Spread half of the coconut rice onto the chocolate modelling chocolate. Leaving about 1/2-inch both upper and lower end of the chocolate uncovered. Place slices of figs and strawberries on top, near the bottom edge of the coconut rice.


8. To roll, lift the wax paper near you and fold it over the fillings. As you roll and the wax paper reaches the surface of the chocolate, pull back the edge of the paper and continue to roll tightly until the roll id completed. Repeat steps 6 to 8 for the other modelling chocolate.


9. Cool both rolls in the fridge on a flat surface overnight to let the modelling chocolate set.


10. Cut chocolate sushi with a sharp knife.

Friday, January 11, 2013

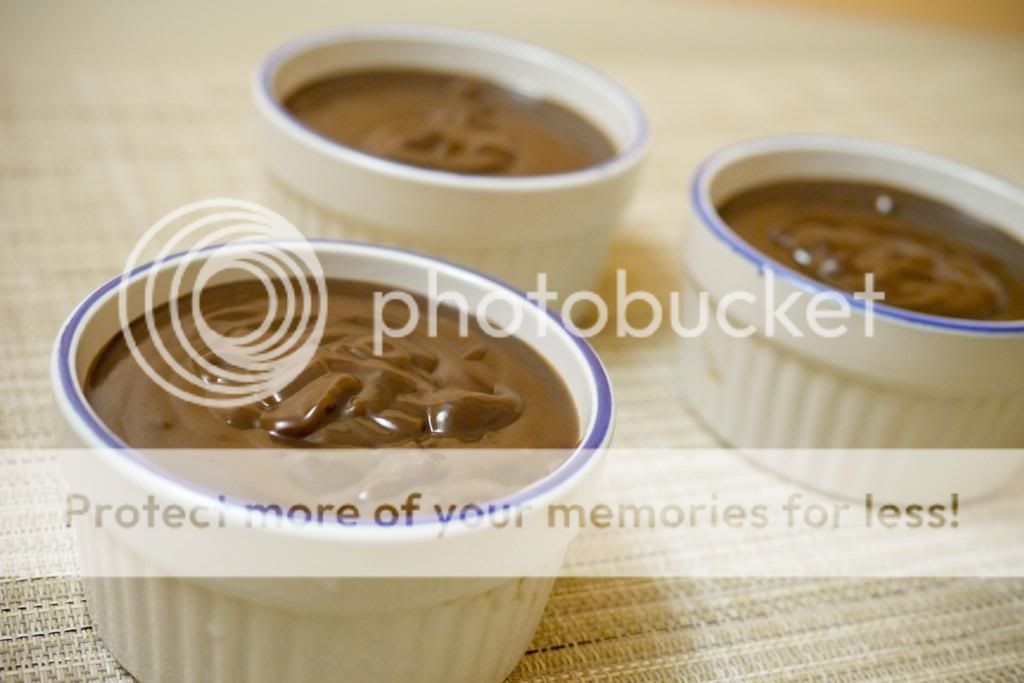
Homemade Chocolate Pudding


Have you ever wondered, when you go to a supermarket, if a product can be homemade? My parents used to buy lots of chocolate pudding when we were child and we tried like different brand of pudding. With time and with a more refined palate, I feel that the store-bought chocolate pudding has a weird after taste and  depending on the brand, some puddings do not taste like real chocolate... What's your take on chocolate pudding?

I made this recipe several times during the holidays with some variations. I experimented with high quality cocoa powder, real Cadbury chocolate pellets, cheaper quality chocolate. It is interesting how each pudding taste different from one to another. I guess this is why it is enjoyable to make desserts homemade.


Question: Do you know how to make chocolate sweeter? Our first educative guess is to add more sugar. Well... in fact, this is wrong. You just need to add a pinch of salt. Try it yourself, take two pieces of chocolate, sprinkle one with sugar and the other with salt. See which is sweeter. When you add salt in any food, it enhances the flavour. It can make sweet things sweeter and cut down bitterness like eggplants. 

These chocolate pudding are indulgent, and easy to make. It requires only pantry ingredients. How could you say 'no' to chocolate?

Fills 6 ramekins
Preparation Time: 5 mins
Cooking Time: 15 mins
Can be served cold or warm

Ingredients
With cocoa powder
1/2 cup brown sugar
3 tbsps cocoa powder
3 tbsps cornstarch
1/4 tsp salt
2 3/4 cups milk

OR

With chocolate pellets
1/4 cup brown sugar
3 tbsps cornstarch
1/4 tsp salt
3 cups milk
about 6 oz. dark chocolate

Procedure

Recipe with cocoa powder
1. In a double boiler, sift cocoa powder and cornstarch. Mix it with brown sugar. Add in milk while whisking until all dissolved. Boil and then bring to a simmer for 15 mins until the pudding thickens. Stir occasionally. Transfer pudding to ramekin.

Recipe with chocolate pellets
1. In a double boiler, sift cornstarch. Mix it with brown sugar.


2. Add in milk while whisking until all dissolved. Boil and then bring to a simmer. Add in chocolate pellets.


3. Simmer for 15 mins until thickens. Stir occasionally.


4. Transfer pudding to ramekins.


5. If serve cold, place a plastic film directly on the pudding to prevent from forming skin. If you like pudding skin, just cover it without contact.

LinkWithin

Related Posts Plugin for WordPress, Blogger...